3D Foiling Trick Within a Discharge Print
Foiling has regained popularity over the past few years as an accent for water base and discharge ink prints. Generally however the foiling falls short of the sparkle that foil can have when it is applied over a textured base.
Artwork: The easiest way to create 3D foil is to substitute the black keyline or outline design element with a puff ink screen, flash it, then print a foil adhesive screen. However adding a textured puff base can increase the quality and ease of 3D foiling. While the outline method works for line art below 1/8th of an inch line weight, larger areas like the Mucom oval’s large ‘M’ (a symbol for the micron btw!) may be difficult to cover smoothly with foil. The answer is to texture the puff base plate with patterns found in Photoshop. The result will be a textured base plate followed by a separate screen with a solid overprint of foil adhesive. This texturing creates bumps and imparts a ‘gold nugget’ look to the foil process when the shirt is run through the oven after the foil is peeled. First we will explore patterns in Photoshop and how to create textures for the puff base plate. Then we’ll show how to use it in the previous design and how we can combine waterbase and discharge inks with this design process. [ezcol_1third id=»» class=»» style=»»]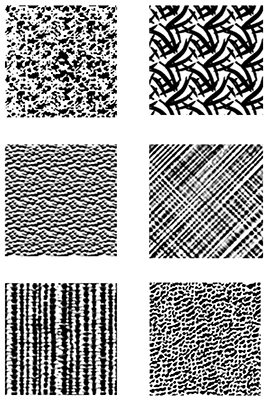 [/ezcol_1third] [ezcol_2third_end id=»» class=»» style=»»]The textures to the left were all made in minutes using patterns found within Photoshop. Some like the cross hatch and the leaves in the upper right corner were created by duplicating the layers, deleting the background to create transparency, then rotated to create the patterns you see.[/ezcol_2third_end]
Notice all patterns have air surrounding the small puff elements. This allows for fast flash times, as well as providing ‘bumps’ that cause the foil to have both a bright pin point reflection as well as dark shadows to create the sparkle effect. The size of the textures on the previous page are about right for a good puff foil effect, any closer together and the puff would be solid with no valleys, any larger and the texture would be too big to work for this application.
[ezcol_1third id=»» class=»» style=»»]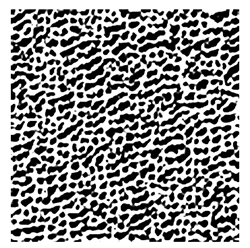 [/ezcol_1third] [ezcol_2third_end id=»» class=»» style=»»]
For more information and specifications on using Murakami products in production please contact our Technical Support Representatives available Monday through Friday 8am to 5pm PST at: (323) 980-0662